Hand Toasties
Kids can be very fussy when it comes to eating, so why not try these Hand Toasties that will put a smile on any child's face.
You will need,
Slice of bread,
A toaster or a grill,
A selection of food colouring,
A muffin tin or some plastic throw away cups,
Paint brushes,
Small plate,
A blunt butter knife.
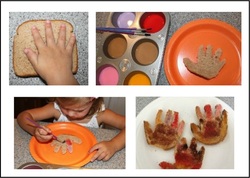
1st you need to toast your bread, while the bread is toasting take your food colourings and muffin tin, pour a small amount of 1 colour into each of the compartments,
Then when the toast as finished toasting leave it to cool, and once it is cool enough to touch, let your child place their hand in the middle of the slice while you carefully cut the bread,
Once you have cut the hand shape out of the bread, take a paint brush, dip it into some food coloring and paint it onto the bread.
We really hope you enjoy making this as much as we did. Thank you for using Kiddie Crafts and why not check out what other ideas we have.
You will need,
Slice of bread,
A toaster or a grill,
A selection of food colouring,
A muffin tin or some plastic throw away cups,
Paint brushes,
Small plate,
A blunt butter knife.
1st you need to toast your bread, while the bread is toasting take your food colourings and muffin tin, pour a small amount of 1 colour into each of the compartments,
Then when the toast as finished toasting leave it to cool, and once it is cool enough to touch, let your child place their hand in the middle of the slice while you carefully cut the bread,
Once you have cut the hand shape out of the bread, take a paint brush, dip it into some food coloring and paint it onto the bread.
We really hope you enjoy making this as much as we did. Thank you for using Kiddie Crafts and why not check out what other ideas we have.
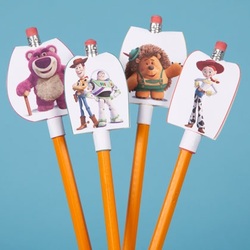
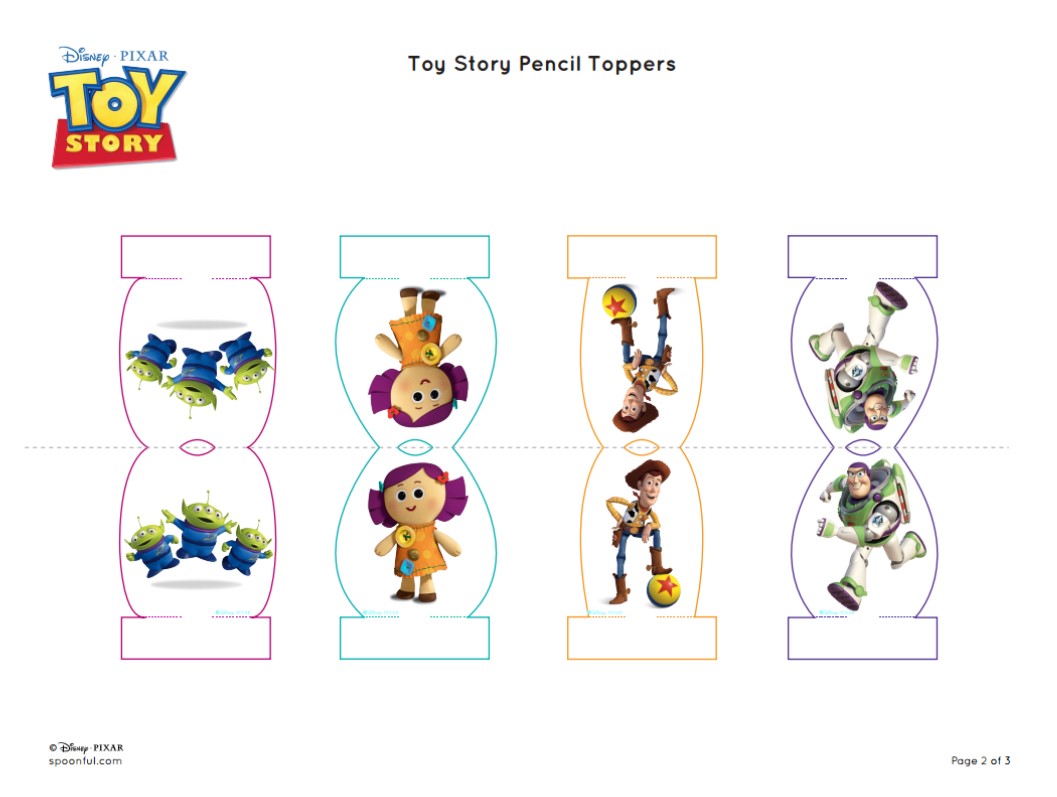
Toy Story Pencil Toppers
You will need:
A Printer,
White A4 paper or card,
Scissors,
Tape.
How to make:
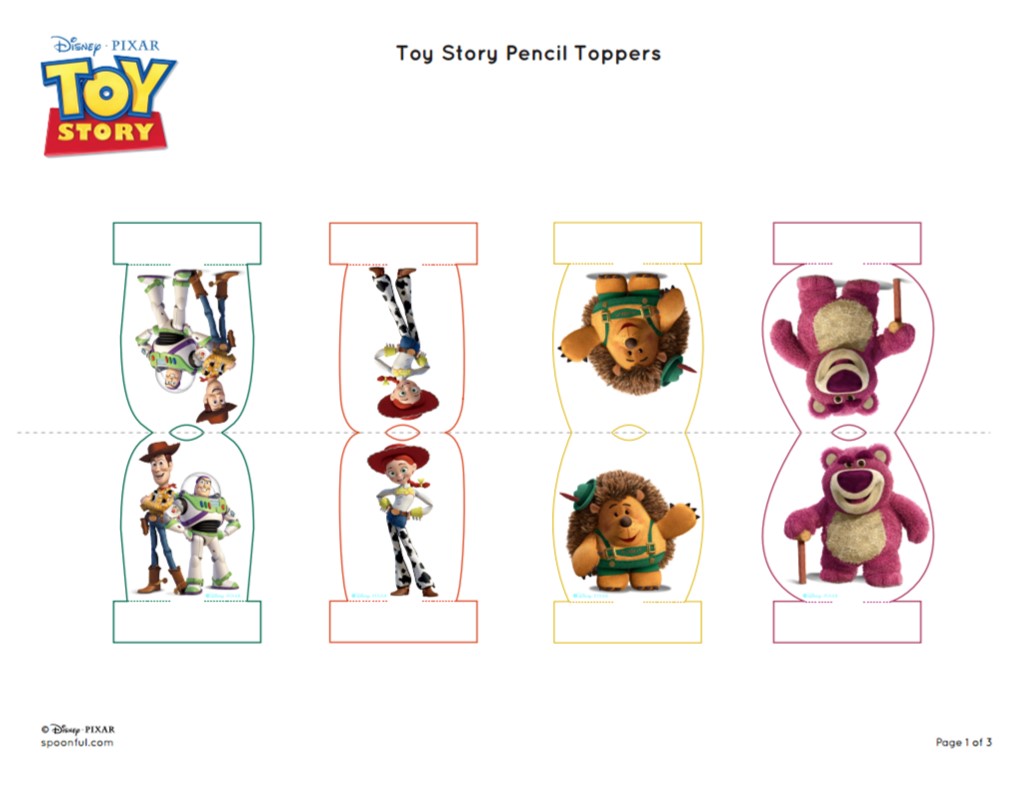
1. Print the page (Can be found below) on regular paper or cardstock and cut out each pencil topper.
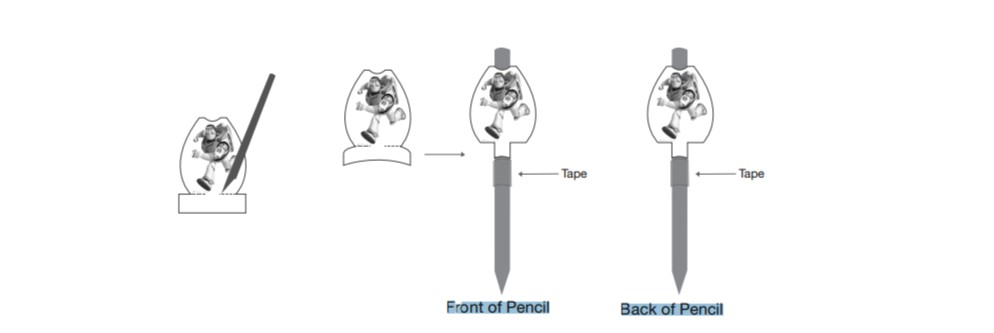
2. Fold each pencil topper in half along the gray dashed line. Cut along the dashed lines at the base of each pencil
topper and cut out the semicircle at the top of each pencil topper.
Toy Story Pencil Toppers: Instructions Front of Pencil Back of Pencil
3. Insert your pencil, eraser end first, into the hole at the top of the pencil topper.
4. Wrap the tabs at the base of the pencil topper around your pencil and secure with tape.
We really hope you enjoy making this as much as we did. Thank you for using Kiddie Crafts and why not check out what other ideas we have.
A Printer,
White A4 paper or card,
Scissors,
Tape.
How to make:
1. Print the page (Can be found below) on regular paper or cardstock and cut out each pencil topper.
2. Fold each pencil topper in half along the gray dashed line. Cut along the dashed lines at the base of each pencil
topper and cut out the semicircle at the top of each pencil topper.
Toy Story Pencil Toppers: Instructions Front of Pencil Back of Pencil
3. Insert your pencil, eraser end first, into the hole at the top of the pencil topper.
4. Wrap the tabs at the base of the pencil topper around your pencil and secure with tape.
We really hope you enjoy making this as much as we did. Thank you for using Kiddie Crafts and why not check out what other ideas we have.
Printable Toy Story Templates
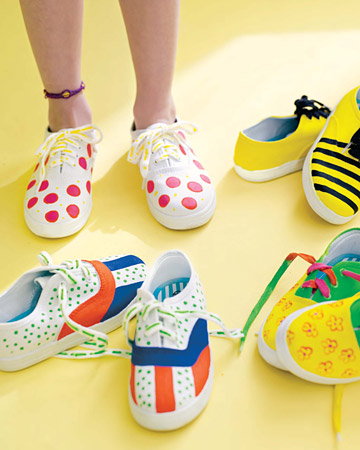
Painted Sneakers
|
Kids can give their plain sneakers a makeover with this charming project.
You will need: Newspaper Clean canvas sneakers Fabric or acrylic craft paint Artist paintbrushes Fabric paint pens. How to make: 1. Cover a work surface with newspaper. 2. Using fabric paints and paint pens, decorate sneakers. 3. Let paint dry for 24 hours before painting another shade on top of the original color. We really hope you enjoy making this as much as we did. Thank you for using Kiddie Crafts and why not check out what other ideas we have. |
Decorated Pencils
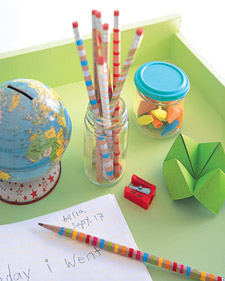
Kids will totally love these decorated pencils and will enjoy using them whether in school or at home.
Follow the step by step guide below and you'll soon have pencils the whole class will be envious of.
You will need:
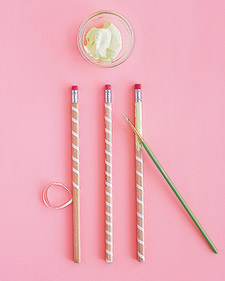
1/16- to 1/8-inch-wide skinny masking tape, depending on the desired stripe size; Acrylic paints;
Plain pencils. Natural-color cedar pencils work well.
Follow the step by step guide below and you'll soon have pencils the whole class will be envious of.
You will need:
1/16- to 1/8-inch-wide skinny masking tape, depending on the desired stripe size; Acrylic paints;
Plain pencils. Natural-color cedar pencils work well.
|
How to make:Begin by wrapping tape around pencil; try a candy-cane design, or wrap in individual circles for parallel lines.
Paint over whole pencil generously with acrylic paint. Kids can make different styles by varying tape size, wrapping tape in different ways, and painting alternating colors between bands. When paint is dry, remove tape. We really hope you enjoy making this as much as we did. Thank you for using Kiddie Crafts and why not check out what other ideas we have. |
|
