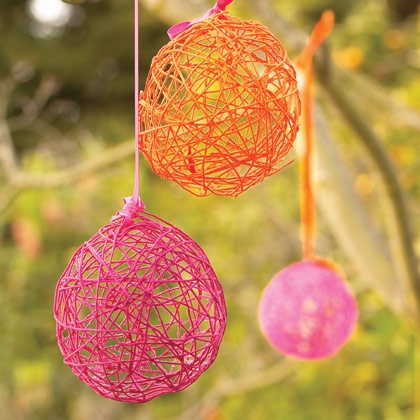
Yarn Balls
|
These bright and funky balls are a blast for kids to make and they're a great party decoration too. If packed away carefully, they should last for years.
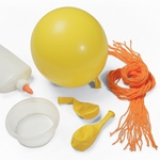
You will need:
|
|
How to make: For each egg, cut twenty 3-foot-long strands of cotton yarn and blow up a balloon to a
6 to 8 inch diameter. Mix equal parts of glue and water in a shallow disposable container. |
|
|
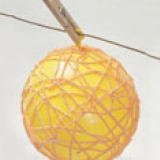
Cover your work area with newspaper and a sheet of waxed paper. Hold a strand of yarn by one end, dip it into the glue mixture, then wrap it around the balloon. Repeat with the other strands, randomly overlapping them and tucking in loose ends, until the balloon is evenly covered
|
|
|
Using the clothespin, suspend the balloon from the clothes hanger and let it dry overnight. (Cover the area below it with newspaper to catch drips.) Once the egg is completely dry, carefully poke a hole in the balloon, then pull it away from the string as it deflates. Hang your finished egg with ribbon or yarn.
We really hope you enjoy making this as much as we did. Thank you for using Kiddie Crafts and why not check out what other ideas we have. |

|
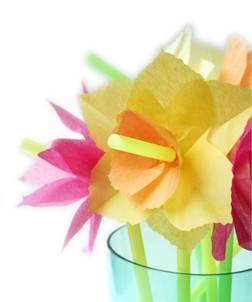
Spring Flower Straws
|
These are fantastic for spring BBQ's or parties. Everyone young or old will LOVE these.
You can buy drinking straws with flowers on them, but it's much more fun (and less expensive) to make them!This is a cute addition to a spring party table, and is a pretty simple project for kids, too. To help keep kids' interest during the project, you can cut out some of the petals ahead of time (you can cut several layers of tissue paper at once). |
|
|
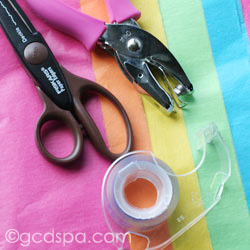
You will need:
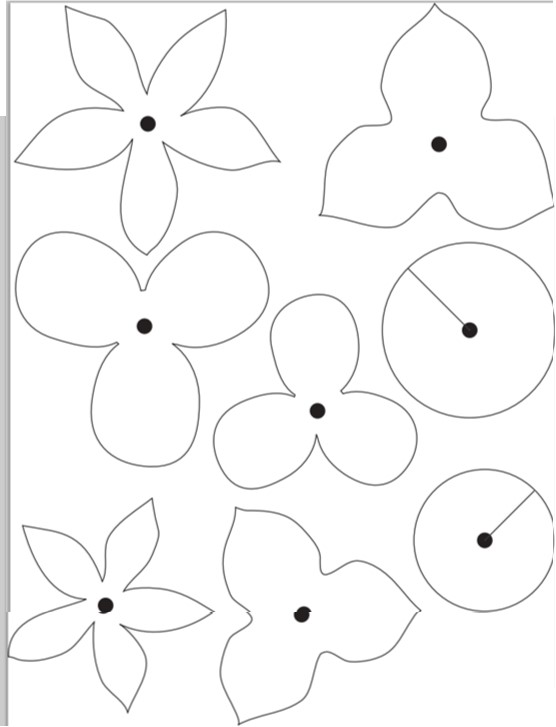
1. Tissue paper in spring colors 2. Drinking straws 3. Scissors (regular ones work fine, decorative scissors are great, too) 4. Hole punch 5. Double sided tape 6. Blossom Template (can be found below) Download our blossoms template and print the PDF file onto cardstock. Then cut out the blossoms and trace around them onto tissue paper. |
|
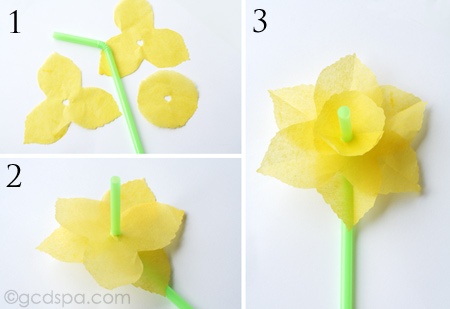
To make a daffodil:
Step 1: Trace two of the pointed three-petaled flowers and one of the circles from the template onto your choice of tissue colors (see step 1 above). Try a contrasting color for the circle (which will make the "cup" in the center of the flower). Use decorative scissors to "ruffle" the edges of some of the petals and the flower's cup. Punch holes in the center of each piece. Step 2: Slide the two flowers onto the top of the straw, rotating the top layer so the petals alternate with the bottom petals (see step 2 above). Use a small piece of tape to secure the layers to each other and to the straw. Step 3: Create a cup shape with the circle piece by trimming along the cut line and then overlapping one side over the other, securing with a small piece of tape. Slide onto the straw over the petals and attach with tape (see step 3 above for finished flower). |
|
|
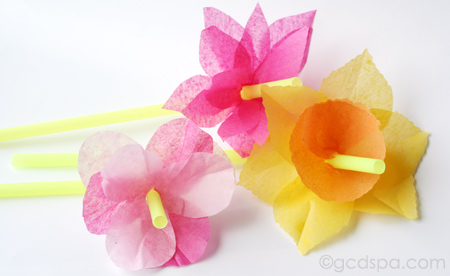
The five-petaled flowers on the template make a pretty gerbera daisy. Cut three or four in your favorite color or colors, punch holes in the center, slide them onto the straw as you did for step 2 for the daffodils, arrange them as you like and tape them together and to the straw. Fold petals down the center to resemble a flower. (See at the top of the photo above).
We really hope you enjoy making this as much as we did. Thank you for using Kiddie Crafts and why not check out what other ideas we have. |
Printable Template:
Sweet Box
|
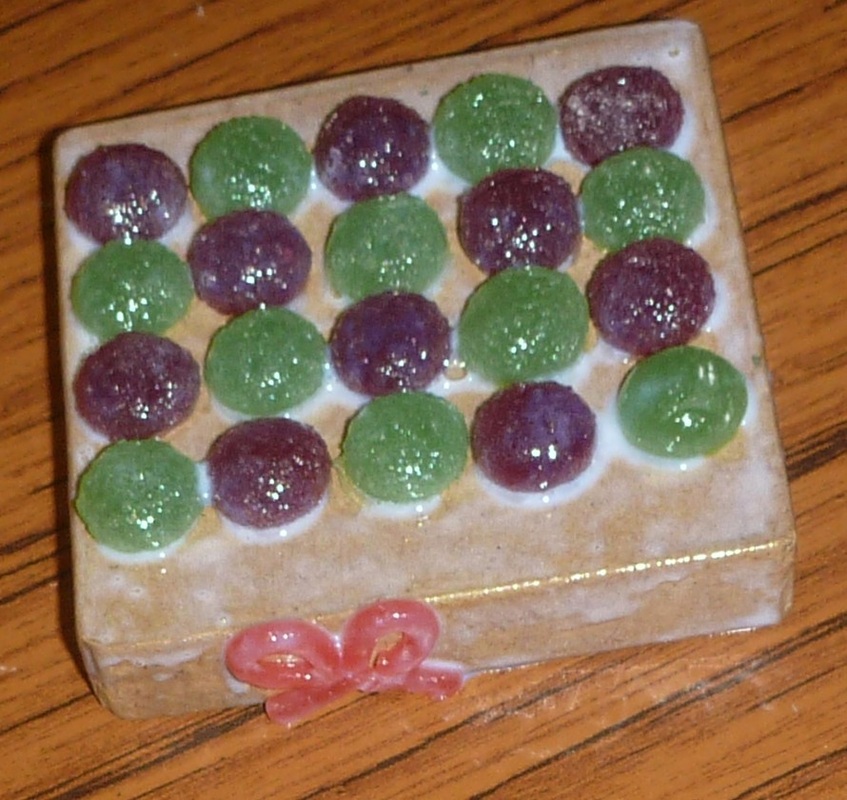
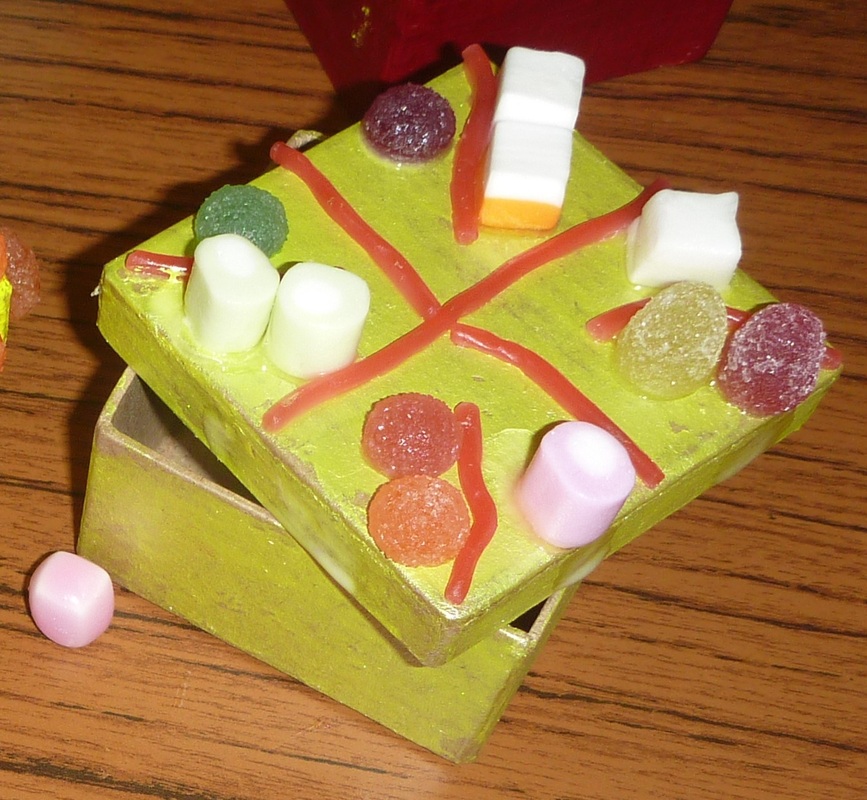
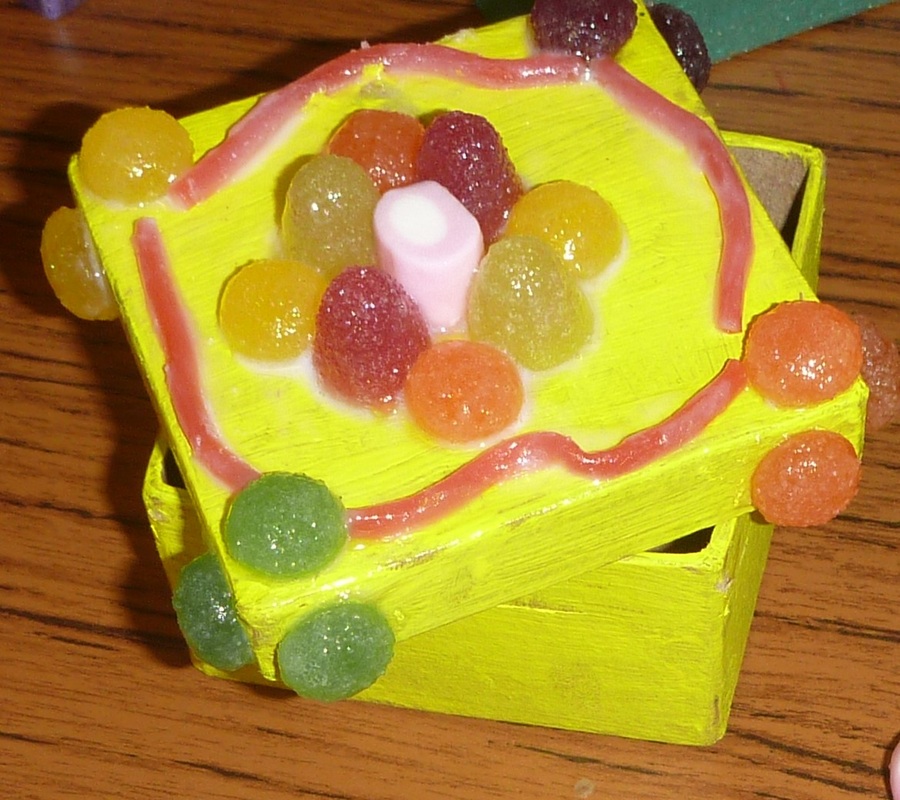
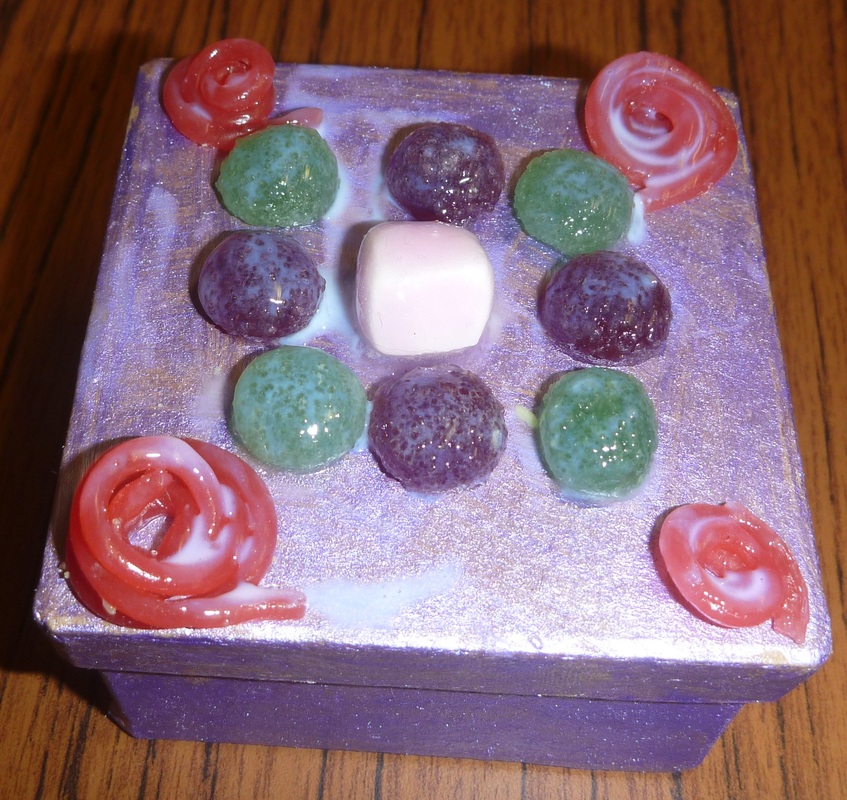
These Sweet Boxes are a really fun craft activity, we tried this out out with a group of guides, they had a great time creating their boxes. The girls needed very little guidance once we had explained the activity and they managed to come up with some really novel designs, I especially liked the strawberry lace bow on the green and purple jelly tots box. There was a lot of laughter and we had a great time with them, thanks to all.
This is a very straightforward craft activity that is easy to organise, with maximum effect. You do need a few specialist things such as the craft varnish and glue, and make sure that you cover tables and that the kids are wearing aprons. |
You will need:
1 x Papier Mache Box, paints (pearlised are very effective), brushes,
PVA glue, Craft acrylic satin varnish, apron
Sweets ( use sweets that have a long shelf life and will not go mouldy quickly, such as liquorice jelly tots, jelly babies, marshmallows, strawberry laces)
How to make:
If you are making the sweetie boxes with children, make sure that they understand that they must not eat the sweets while they are making the boxes as the glue and varnish maybe toxic. Also make it clear that they must never pick the sweets off the box and eat them at a later date. It might be worth withholding some sweets that the kids can have once they’ve made their box and everything has been cleared away and hands washed.
Step 1. Plan your design; think about the colour you want to paint your box and the sweetie design that you want to put on the box.
Step 2. Put down a protective covering on the table you are using. Paint the box and leave to dry.
Step 3. Once dry, stick the sweeties to the lid and side of the box using the pva glue.
Step 4. When you are happy with the design, cover all the sweets in a generous layer of varnish and leave to dry.
These make great gifts or special boxes for keepsakes.
We really hope you enjoy making this as much as we did. Thank you for using Kiddie Crafts and why not check out what other ideas we have.
|
|
|
|
|
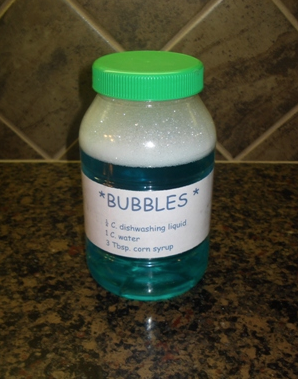
Homemade Bubbles
|
These easy recipes for making bubbles at home will be sure to entertain your kids for hours!
Basic Homemade Bubbles I1/4 C. Liquid Dishwashing Detergent (grease-cutters are best) 3/4 C. Water 1-1/2 Tbsp. Light Corn Syrup Basic Homemade Bubbles II2 C. warm water 1/4 C. good quality dish soap (i.e. – Dawn) A little food coloring or paint/Kool-Aid powder 2 Tbsp. glycerine or corn syrup Basic Homemade Bubbles III2 C. warm water 1 C. liquid dishwashing soap 1/2 C. glycerine 1 tsp. sugar Basic Homemade Bubbles IV1 C. dishwashing liquid 1 C. water 1 Tbsp. corn syrup Mix together. Use straws, funnels, six-pack can holders, whisks, small cookie cutters, etc. to blow bubbles. Store bubble solutions in an airtight container. |
Bubble Pipe
Paper Cup Straw Dish detergent Water Food coloring |
Help your child make this simple bubble pipe. Poke a pencil hole on the side of a paper cup, one inch from the bottom, and stick a drinking straw through it, halfway into the cup. Pour dish detergent into the cup until the straw is covered. Add a little water and a few drops of food coloring. Blow gently until beautiful colored bubbles froth over the rim of the cup and fill the air.
We really hope you enjoy making this as much as we did. Thank you for using Kiddie Crafts and why not check out what other ideas we have.
We really hope you enjoy making this as much as we did. Thank you for using Kiddie Crafts and why not check out what other ideas we have.
